Mastering the Art of Over Easy Eggs: Perfectly Runny Yolks, Every Time
Few culinary delights can rival the simple perfection of a perfectly cooked over easy egg. With its delicately set whites and a luscious, gloriously runny yolk, it's a breakfast champion that elevates any meal. Yet, for many home cooks, the mere thought of flipping an egg without rupturing that golden orb can be a source of anxiety. The fear of a broken yolk often leads to overcooked eggs or a retreat to scrambled alternatives.
But what if we told you that achieving flawless over easy eggs is not just for professional chefs? It's a skill within reach for anyone, requiring just a few key techniques, a patient hand, and the right approach. Forget eggs flying through the air or sticky messes. This comprehensive guide will demystify the process, turning you into an over easy egg master, ready to impress yourself and your family with beautifully crafted eggs that boast that signature liquid gold center.
Why Over Easy Eggs Are a Culinary Must-Try
Often considered the sophisticated sibling to sunny-side up, over easy eggs offer all the coveted runny yolk goodness, but with an added layer of elegance: a quick, gentle cook on the top side that creates a delicate seal. This brief second fry means no raw, translucent whites on top, just a smooth, opaque finish that hints at the delightful cascade of yolk beneath.
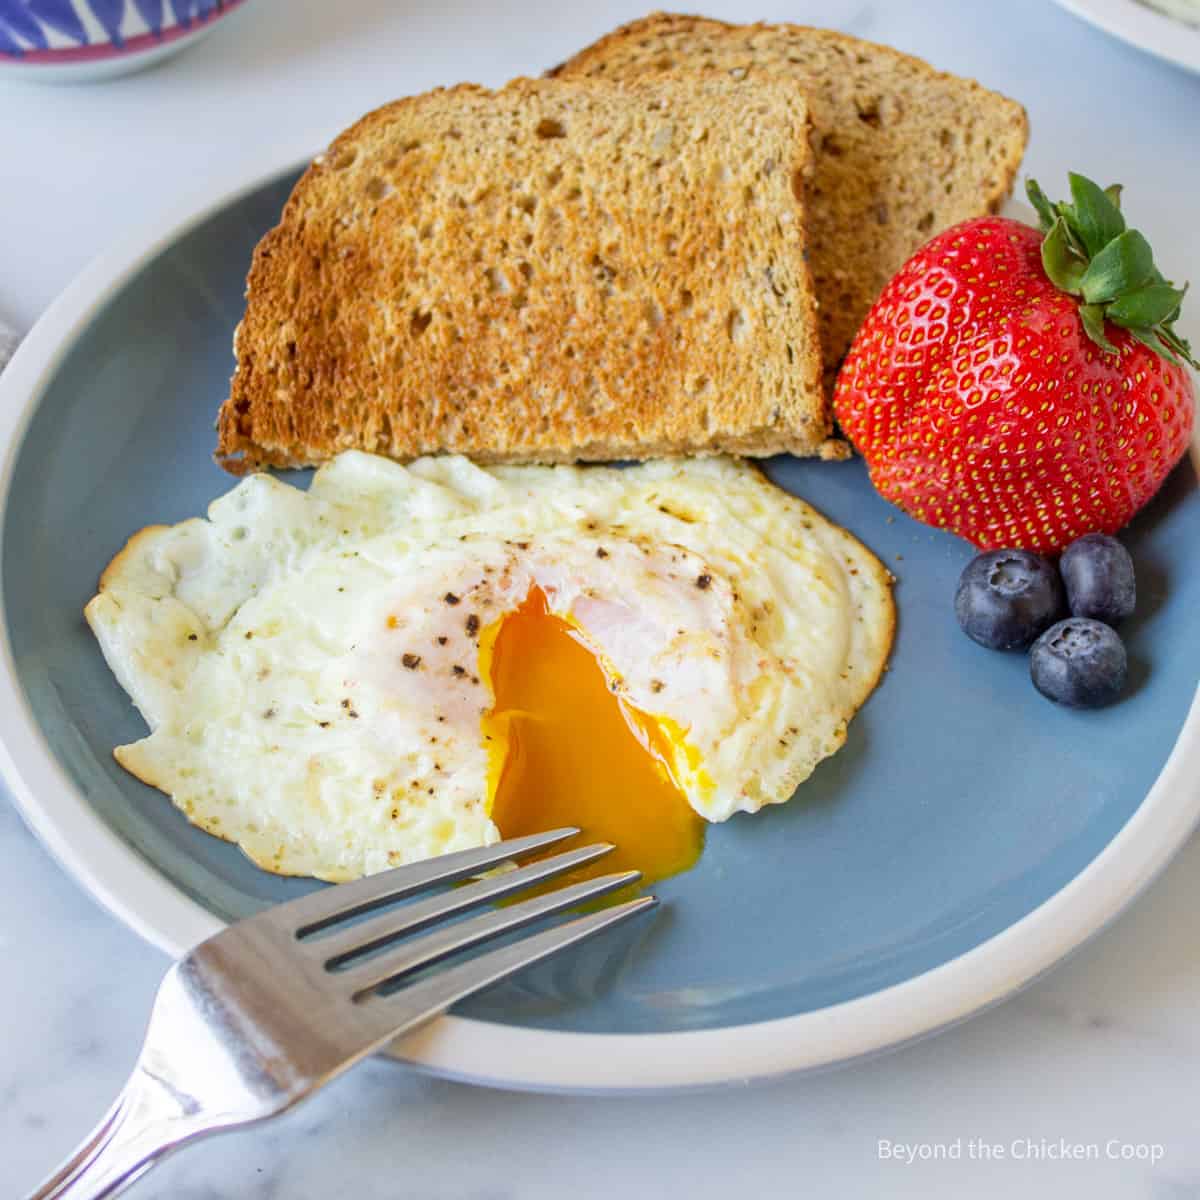
Many egg enthusiasts proclaim over easy eggs to be the pinnacle of fried egg preparation. They strike a sublime balance, providing a satisfying texture from the set whites while ensuring the rich, creamy yolk remains exquisitely fluid. This makes them incredibly versatile, transforming anything from a humble piece of toast to a gourmet burger into a decadent experience. Once you unlock the secret to no-fail over easy eggs, you'll understand why they're such a beloved culinary staple.
Essential Tools and Ingredients for Success
Before you even crack an egg, gathering the right equipment and fresh ingredients is paramount. Think of this as laying the groundwork for your perfect over easy eggs:
- A High-Quality Nonstick Pan: This is arguably the most crucial tool. A truly nonstick surface is your best friend when it comes to preventing sticking and ensuring a smooth, effortless flip. A pan around 8-10 inches is ideal for cooking 1-2 eggs at a time.
- A Thin, Flexible Spatula or Turner: Avoid thick, rigid spatulas that are prone to tearing delicate egg whites. A thin, preferably silicone or metal (with a thin edge), flexible spatula can slide easily under the egg without resistance.
- Your Choice of Fat: Whether it's butter for rich flavor, olive oil, avocado oil, or coconut oil for a neutral taste and higher smoke point, or even a bit of lard for a traditional touch, you'll need 2-3 teaspoons. The amount can vary slightly depending on how seasoned or nonstick your pan truly is.
- Fresh Eggs: The fresher the egg, the firmer the whites and the higher the yolk will sit, making them easier to handle and less prone to spreading too thin. Room temperature eggs also tend to cook more evenly.
- Optional: A Lid for the Pan: While not essential for the traditional "over easy" flip, a lid can be helpful for those who prefer to steam the top of the egg rather than flip it (though we'll focus on the flip here!).
The Step-by-Step Guide to Perfect Over Easy Eggs
Now, let's dive into the precise steps to achieve those coveted runny yolks without a single break.
1. Preheat Low and Slow
The secret to beautifully cooked whites and a perfectly soft yolk begins with heat control. Resist the urge to crank up the burner! You want a low to medium-low heat setting. On most stovetops, this might be a '3' or '4' out of '10'. High heat leads to crispy, rubbery whites before the yolk has a chance to gently warm, and increases the risk of sticking.
Place your nonstick pan on the burner and allow it to preheat for 1-2 minutes. This ensures even heat distribution across the cooking surface.
2. Add Your Fat
Once the pan is warm, add your chosen fat. Let it melt and shimmer gently for about a minute. The fat should coat the bottom of the pan evenly but not smoke. If it starts smoking, your pan is too hot – remove it from the heat for a moment, reduce the temperature, and try again.
3. Crack Your Egg with Care
There are two main approaches here:
- Directly into the Pan: Crack the egg gently on a flat surface (not the rim of the pan, which can push shell fragments into the egg) and carefully lower it into the preheated, greased pan.
- Into a Small Bowl First: For beginners or those who want extra insurance against shell fragments, crack the egg into a small bowl first. This allows you to easily remove any errant shell pieces before gently sliding the egg into the pan.
Avoid dropping the egg from a height, as this can cause the yolk to break or the white to splatter excessively.
4. The Initial Cook: Whites Set, Yolk Still Wobbly
Allow the egg to cook gently for approximately 2-3 minutes. During this time, the egg whites will gradually solidify, turning from translucent to opaque. Keep an eye on the edges; they should be setting but not browning or crisping. The key indicator that it's ready for the flip is when the majority of the white is set, but there's still a tiny bit of translucent, almost liquid white clinging to the yolk.
Pro Tip: If you find your whites are spreading too thin, gently nudge them inward with your spatula to create a more compact egg shape.
5. The Dreaded Flip (Made Easy!)
This is where many people get nervous, but with the right technique, it's surprisingly simple. Check out our detailed guide on Mastering Over Easy Eggs: Perfect Flipping & Runny Yolks for more in-depth tips!
- Loosen the Egg: Gently slide your thin spatula under the egg, starting from one edge and working your way around to ensure no part is sticking. If it's a quality nonstick pan, this should be effortless.
- Position the Spatula: Once the egg is loose, slide the spatula completely underneath the egg, making sure the yolk is centered on the spatula's surface.
- The Gentle Flip: Keep the spatula low to the pan. With a quick, confident, and gentle wrist flick, flip the egg over. The goal is to minimize the drop height of the egg back into the pan. A low flip reduces the impact and the risk of breaking the yolk.
Alternative (but not truly "over easy"): If you're utterly terrified of the flip, you can add a tablespoon of water to the pan and immediately cover it with a lid. The steam will cook the top of the egg. Alternatively, you can spoon hot oil/butter over the yolk. However, these methods don't achieve the same delicate seal and subtle texture that flipping provides.
6. The Second Cook: Yolk Perfection
Once flipped, cook the egg for a very short duration – typically 20 to 25 seconds. This brief cook time is just enough to set the thin film of white over the yolk without firming up the yolk itself. The exact time will depend on your desired level of runniness. Less time (around 15 seconds) will yield a very liquid yolk, while slightly longer (25-30 seconds) will create a marginally thicker, but still runny, consistency.
7. Retrieve and Serve
Carefully slide your spatula back under the egg and gently flip it back onto your plate, yolk side up. This allows you to admire that perfectly sealed, slightly opaque surface. Season with a sprinkle of salt and freshly ground black pepper, or any other seasonings you prefer.
Achieving Your Ideal Yolk Consistency
The beauty of over easy eggs lies in their adaptability to your preferred yolk texture. Here’s how to fine-tune it:
- Super Runny (15-20 seconds after flip): The yolk will be almost completely liquid, breaking open with the slightest touch. Perfect for dipping toast.
- Classic Runny (20-25 seconds after flip): The most common preference, where the yolk is beautifully fluid but has a slightly thicker, warmer texture.
- Barely Wobbles (25-30+ seconds after flip): If you prefer a yolk that's still soft and gooey but holds its shape a little more, extend the post-flip cooking time slightly. Gently press the yolk with your finger (careful, it's hot!) – if it barely wobbles, it's ready.
Serving Suggestions & Culinary Versatility
The delicious versatility of over easy eggs is truly limitless. They aren't just for breakfast anymore!
- Classic Breakfast: Serve alongside crispy bacon, sausage, hash browns, or on top of avocado toast.
- Lunch & Dinner: Elevate a burger, top a bowl of ramen, add protein to a simple green salad, or nestle them into a breakfast sandwich.
- Comfort Food: Spoon over grits, polenta, or even leftover rice for a quick, satisfying meal.
For more creative ideas and inspiration on how to incorporate these delightful eggs into various meals, check out our guide on Unlock Runny Yolk Perfection: Over Easy Eggs for Any Meal.
Troubleshooting Common Over Easy Egg Mistakes
Even with the best intentions, things can go awry. Here’s how to tackle common issues:
- Broken Yolks: This is often due to flipping with too much force, not getting the spatula fully under the egg, or the egg sticking to the pan. Ensure your pan is truly nonstick, use enough fat, and practice a gentle, low-to-the-pan flip.
- Overcooked Yolks: The most common culprit is cooking for too long after the flip, or using heat that is too high. Remember, only 15-30 seconds are needed post-flip.
- Sticking Eggs: Usually a sign of insufficient fat, a pan that isn't truly nonstick, or a pan that wasn't properly preheated. Always preheat your pan with fat before adding the egg.
- Crispy/Browned Whites: Your heat is too high! Reduce the temperature and cook more slowly.
Conclusion
Cooking perfect over easy eggs might seem intimidating at first, but with a patient approach, the right tools, and a bit of practice, you'll be creating breakfast masterpieces in no time. Remember the key principles: low and slow heat, a well-oiled nonstick pan, and a gentle, confident flip. Embrace the process, savor the reward, and enjoy that delightful burst of runny yolk that makes over easy eggs a true culinary treasure. So go ahead, crack those eggs, and start flipping your way to breakfast perfection!
